E15 | Toys and Colors, Air Switch | Ask This Old House
Season 24 Episode 15 | 23m 42sVideo has Closed Captions
"Toys and Colors" kids help build a dress-up closet. Richard installs a garbage disposal.
Tom Silva discusses common types of caulks and sealants he uses and explains their applications. Richard Trethewey breaks down the anatomy of a garbage disposal, then shows how to install the unit with an air switch controller. Kevin O'Connor is joined by Wendy and Kaden, the young hosts of the popular online channel "Toys and Colors," to build a children's dress-up closet.
Problems playing video? | Closed Captioning Feedback
Problems playing video? | Closed Captioning Feedback
Funding for Ask This Old House is provided by The Home Depot, Renewal By Andersen, and ChipDrop.
Support provided by:


E15 | Toys and Colors, Air Switch | Ask This Old House
Season 24 Episode 15 | 23m 42sVideo has Closed Captions
Tom Silva discusses common types of caulks and sealants he uses and explains their applications. Richard Trethewey breaks down the anatomy of a garbage disposal, then shows how to install the unit with an air switch controller. Kevin O'Connor is joined by Wendy and Kaden, the young hosts of the popular online channel "Toys and Colors," to build a children's dress-up closet.
Problems playing video? | Closed Captioning Feedback
How to Watch Ask This Old House
Ask This Old House is available to stream on pbs.org and the free PBS App, available on iPhone, Apple TV, Android TV, Android smartphones, Amazon Fire TV, Amazon Fire Tablet, Roku, Samsung Smart TV, and Vizio.
Keep Exploring


This Old House Insider Newsletter
Get This Old House exclusive stories, tips, and behind-the-scenes information delivered right to your inbox every month.Providing Support for PBS.org
Learn Moreabout PBS online sponsorship♪♪ Kevin: On "Ask This Old House," our experts travel across the country to answer questions about your house.
♪♪ Today, do you have questions about the various types of caulking materials and when to use them?
Tommy has all the answers for you.
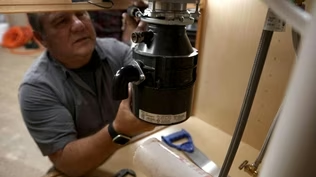
Then Richard helps a homeowner install a garbage disposal that uses an air switch.
And I host some special guests from the popular online channel Toys and Colors in the workshop to build a dress-up closet.
All that on "Ask This Old House."
Kevin: Hey, Tommy.
Tom: Hey, Kevin.
How are you?
Kevin: All right.
You're well armed with your caulk guns here.
Tom: Yeah, well, you never know when you need some caulking.
And it's usually a lot around a project site.
Kevin: And there's a lot of different kinds.
I mean, when you walk down the aisle, there is just an endless selection.
Tom: Mind blowing, the stuff that's out there.
I mean, the painter will use a latex caulking on the interior walls.
You know, use it around your casing, your trim, your baseboard, wherever a wall meets a transition to something, a molding or whatever.
And you want to fill that little joint.
And a latex is perfect for that because it fills the gap and it's paintable.
Kevin: Right.
Tom: I like to see primer put on the wall before they use the caulking, because it gives a little more adhesion to the caulking.
Kevin: Okay.
And if we were to jump outside and we knew we had a painter who wanted to fill some holes or gaps and was going to paint it, would you stick with this or would you -- Tom: I'd probably go to an acrylic like this.
It's an acrylic caulking with silicone added to it.
Kevin: So when you move out of sort of straight latex and you start putting in some of the other ingredients, what are you adding and why?
Tom: We are adding the adhesion capabilities.
That's what you're getting out of some of the acrylics, but also with some of the silicone that's in it, you're getting some water protection that you wouldn't normally get.
And the key is with these exterior caulkings, there's a lot more expansion and contraction.
So you want that caulking to flow and be able to go with the expansion and contraction.
Kevin: Okay.
You mentioned silicone.
You can actually have just straight silicone, right?
Tom: Right.
And I only like 100% silicone.
It's pricey, comes in all different kinds of colors because you really can't paint it.
But this is great for like bathrooms where the wall -- the shower's running on the wall where it meets the tub.
That joint needs to get filled with something that will stick well and be waterproof.
You don't want the water to get in behind the wall.
Kevin: How about, like, metal?
I'm thinking again outside.
You're on your gutters and you want to make a connection between two pieces.
Silicone or...?
Tom: This is what you want to use is basically a butyl.
And it's used a lot in the commercial industry.
It should be used more.
We used it a lot when I was younger.
And it's like a rubber sealant that stays soft for a long, long time.
It can be messy.
Kevin: Yeah.
Tom: All right?
But it's fantastic.
Let's say, for example, you have a tile floor and you might have a long joint in it, an expansion joint.
Well, you don't want to grout it.
You basically caulk it with a color to match the grout.
The butyl will adhere to the tile nicely, but it will also bend and stretch as the floor expands and contracts.
Kevin: So the elasticity here is actually great.
Tom: Right.
And the thing with all caulking, I don't care what you do, especially silicone, if you have a joint that's failed, you cannot caulk over that material.
Kevin: No silicone on silicone.
Tom: It won't stick.
It'll look good for about an hour, but it will not stick.
You have to clean it off completely and, you know, scrape it or pull it off, whatever you're going to do.
I like to take a razor blade, if you're doing around a tub, and scrape it really clean and then rub it, maybe with some cleaner like that.
Sometimes I'll use lacquer thinner or even denatured alcohol to make sure it's clean, then it has to be dry.
And then you can apply a new coat.
Kevin: Okay.
Well, in terms of applying, let's see what some of the stuff just sort of looks like laid out.
But before you do, I know you're particular about opening these things because sometimes you like a square edge, an angled edge.
Tom: Yeah.
Again, it depends on the application.
But let's say this -- caulking guns come with this little hole right here.
All right?
Now, if you look when I pull the trigger, there's a little cutter in there that just cuts it off so that you put the tip of the caulking gun right in there and cut it.
And that cuts the tip right off.
Kevin: Oh, yeah.
So it just actually took the rest of that off.
Tom: Right, right.
So now that's ready to go.
Kevin: All right.
Well, let's lay some of this stuff down.
I'll give you back the elastomeric sealant here, which is a latex.
Tom: So some guys like to pull it and some guys will push it.
I'm going to start it flow and I'm going to continue.
And I can control the flow by lessening the pull on the trigger.
And when you push it, it will push it into a crack.
Kevin: Let's have a look at a bead of silicone.
Tom: So that's clear.
And again if I push it.
Kevin: I've known you for a long time, pops, and you've always been a pull kind of guy.
Tom: I always pull it.
Yeah.
This is butyl, and it can be messy, so let's see.
Kevin: Well, you can see why that almost -- It almost looks like an exterior product.
Just, you know, I mean, it obviously is.
Okay.
So a lot of choices.
Know what your project is and pick the right tube for the right project.
Tom: And make sure you prep it right, just like anything you're doing, like painting.
You want to prep it right.
A little bit of primer on the interior before you use your latex will make the caulking stick to the wall and the trim better.
Kevin: Beautiful.
♪♪ Richard: Hello, there.
Emily: Hi.
How are you?
Richard: I'm Richard.
Emily: I'm Emily.
Richard: Nice to meet you.
Emily: Nice to meet you too.
Richard: I love your place.
Emily: Thank you so much.
So this is a newly renovated place.
We bought it a couple of years ago, and I love the place, but they did -- Yeah, they did miss something when they renovated it.
Richard: What'd they miss?
Emily: A garbage disposal.
Richard: Really?
Emily: Yes.
Richard: I mean, you got stone counters, a beautiful island, all kinds of great appliances.
And they didn't put the disposer in.
Emily: Yes.
Richard: I'm glad I came by.
All right, well, let's see hat you got under here.
Well, they certainly left room for it.
It's wide open.
Nice and clean, too.
Emily: Definitely.
Richard: So we can modify the plumbing for the disposer.
That's going to be fine.
And I see they've got electrical roughed in.
There's a box right there.
A lot of times the biggest part of this job is actually the electrical where you call electrician in to either add a switch up here or a switch right here that you can reach for.
But I actually have a thing called an air switch that I want to get and show you that we can put it in together.
Emily: Sure.
Richard: All right.
All right.
So this is your new disposer.
Say hello.
Emily: Hello.
Richard: So this one's a 3/4 horsepower.
They come in every different-size horsepower -- 1/3, 1/2, 3/4 -- all kinds of insulation levels.
And most of them nowadays are called continuous feed, where you're going to just turn it on and run the disposer and grind the food up.
Now, one thing that is standard in the plumbing industry, there's not many, and that is the mounting flange assembly.
This is the sink flange assembly.
And what we're going to do is take out the existing basket strainer that's over there.
And then this is the part that will go onto the sink.
We'll put putty right in here, push that down through the sink.
And from the other side I'm going to push this up to the underside and then make this spring clip to the bottom.
And so now it'll hang on the sink.
I'll tighten up these screws.
And once that happens, we can close this lock ring.
And now we can hang the disposer from the sink assembly.
Okay?
Once that happens, we now can determine how to make these plumbing connections.
Because you can turn this elbow any way we want to.
We can modify the plumbing.
And once we get it right, we'll glue it all together.
Okay?
That's the plumbing part.
And we also have a dishwasher.
Emily: Yes.
Richard: So the dishwasher needs to have a drain.
So any disposer has a port.
And they make this adapter which modifies to any different size tapping on any disposer or drain hose.
And you'll just tighten those up.
And you really want this to be tight because that dishwasher has a fair amount of water coming in, and you want that to be tight.
So you'll make sure I do that, right?
Emily: Yes.
Absolutely.
Richard: Perfect.
So as I mentioned, these are all continuous feed nowadays.
So it's an appliance plug.
Now, in the old days, and you still can get them now but it's a lot less popular, there's a thing called a batch feed which means inside this mechanism is a way that you can turn on the disposal by putting a magnet control or a little bayonet switch inside here.
And when you turn it on, it'll come on then and only then.
So they're less popular.
And now more and more people are using the continuous feed.
But that means you have to either have a wall switch or a switch underneath, or what you're going to get, which is this air switch right here.
Emily: Right.
Richard: So the air switch, we bring in the 110 volt, and we plug it into the wall down underneath the sink.
We plug in the disposer into this air switch.
And then right here is a little air switch that works by air.
So this thing that looks like a wire is not, it's actually a tube.
This is how you're going to bring this on.
This is an air switch.
It pushes a shot of air down.
And it makes that little switch in there to bring on the 110.
You've now got a way to bring this disposer on without the electricity ever getting close to you.
Now, I don't recommend this, but I want to just show how this switch works.
So you hit that button and watch what happens.
Now turn it off.
Okay?
Emily: Okay.
Richard: So now it's a simple operation.
It's easy to keep clean.
It's also much more convenient.
It'll be up right where you use it at the sink, okay?
So what we'll need to do is to drill into the stone countertops.
So that turns out it might be one of the hardest parts of this job.
Emily: Right.
Simple.
Richard: Are you ready to get to work?
Emily: Yes.
Richard: You're going to be my helper.
Let's go.
All right.
We need to excavate the plumbing connections.
The drain connections.
So now we can loosen the basket strainer nut right here.
And that'll remove the last piece that's connected to the sink.
All right, now it's time to install the new disposal.
Emily: Okay.
Richard: So we want a really good connection right here where it connects to the sink, so you're going to do it.
Emily: Okay.
Richard: All right.
So just push that piece down.
Okay.
And hold against me now.
And now I got to get that spring clip.
There's the click.
Okay, I'm going to snug these up, and you should start seeing some of that putty oozing out.
Emily: Yes.
♪♪ rrAll right, so this is a stone surface.
So what I've done is I've taped off the surface.
I've marked where I want it to be.
This has carbide grit.
♪♪ Oh, Emily, see this?
Emily: Yes.
Richard: Can you make that connection to the bottom of the air switch button?
Emily: Yep.
Richard: Push it on good.
And then push it down through to me and hold against me so I can tighten up the nut down here.
That should do it.
I just need to cut the air tube and plug it into the switch.
♪♪ All right, now we just need to make our drain connection from the disposer.
♪♪ ♪♪ Last thing to do is our dishwasher discharge.
All right, we are all cleaned up and ready for the ultimate test from you.
So give it some water run first always.
[ Whirring ] And it works.
Isn't that convenient?
Emily: Yes.
Very simple.
Richard: And it finishes off your perfect kitchen.
Emily: And I love it even more now.
Richard: Well, just turn it on for just another second.
All right?
All right, I just got a text from my doctor.
Emily: [ Laughs ] Richard: We'll see you.
Better there.
Emily: All right.
Richard: See ya.
♪♪ Kevin: So we got an interesting message from the kids at Toys and Colors.
It's an ensemble of kids who love to make things -- Projects with their hands, community.
They love using colors and embracing play.
And they had a great idea for something that we could build together.
So we invited them to the barn so we can do that.
And they are here now.
Hey, guys, how are you?
Kaden: Good.
How about you?
Kevin: I'm doing all right.
I'm Kevin.
Kaden: I'm Kaden.
Kevin: Kaden, pleasure.
Wendy: I'm Wendy.
Kevin: Wendy, welcome to our workshop here.
We're glad to have you.
So we got your message that you guys wanted a little help building something.
Wendy: Yeah.
We like to play.
Kaden: A lot.
Kevin: Play what?
Kaden: Dress up.
Kevin: Oh, costumes and stuff?
Kaden: Mm-hmm.
Kevin: All right.
Kaden: And we were wondering if you can build a dress-up closet.
Kevin: A dress-up closet for you guy's costumes.
Sure.
We like the idea, in fact.
And our carpenter extraordinaire, Tommy Silva, actually went ahead and gave us some drawing to work off of.
So as you can see, this is going to be for hanging clothes.
And then on the left side we're thinking three shelves to hold baskets, maybe for shoes or masks or whatever.
And then top sides, this is like a nice little way to dress it up.
That's what we call an apron.
What do you guys think of that?
Kaden: Yeah!
Wendy: That's really good.
Kevin: All right, we're on the same page.
So let's talk about the materials we're going to use.
And most of it is going to be a pine board.
That's what this is.
And we call this a 1x12.
You know why?
Kaden: Because it's 1x12?
Kevin: Oh, my gosh.
Yes, almost.
So this is the weird thing.
As I measure its width, what does that say?
Wendy: 11 1/4": Kevin: 11 1/4".
And if you look on the side, what does that say?
Wendy: 3/4".
Kevin: 3/4".
So it's a little less thick than a full inch.
It's just weird.
But we're going to call them 1x12s.
Kaden: Okay.
Kevin: Okay.
So we're going to use the 1x12s for the top right here, the sides going down, the bottom, and then we're going to cut one into a couple shelves right there.
Kaden: Okay.
Kevin: Then behind the shelves we're going to have a back and we're going to use plywood.
So this one happens to be 1/4 inch because we don't need much for the back.
It's just going to kind of cover it up.
Then you see this right here?
Kaden: Yes.
Kevin: The closet rod.
What do you think we're going to use for that?
Wendy: This one.
Kevin: Yes.
This one right here, a dowel.
And so this has got two dimensions that we care about.
The length, which is just a hair under 19.5", and then the diameter.
And you guys probably know that that's the line that goes right through the center here versus the measurement that goes around, because that's something different.
And on this one, our diameter is 1 1/4 inch.
So that's going to go right there.
Are you with me?
Kaden: Mm-hmm.
Kevin: Cool.
So we're going to cut some boards and then we're going to screw them together.
You guys up for that?
Wendy: Yeah.
Let's get started.
Kaden: Let's get started.
Kevin: Love it.
Let's do it.
♪♪ Okay.
You guys ready to cut?
Wendy: Yeah.
Kevin: All right.
I love the fact I see you suited up.
So you've got your ear protection in and you've got these.
We've got a friend who likes to say that there is no more important safety rule than to wear these.
So you guys got your safety glasses on as well.
So this is a chop saw, miter saw.
We're going to use this.
And, Wendy, I'm going to just give you a little bit of a primer.
So this is the apron.
And we're going to cut it right to that line right there.
And when you use a saw like this, the most important thing is that you push it up against the fence.
And that's the extension fence right there.
You're going to hold it up tight against that with your hand left of the blade and far away, and then you're able to move it back and forth when you're getting ready, and you're going to try to position the blade so in this case it lands just on the line.
You see that?
Wendy: Yeah.
Kevin: And when you think you've got it in the right place, push it up tight way away from the blade.
And then you've got a two-trigger start.
So there's a trigger underneath here you're going to slide with your thumb.
And then on the grip, you're going to squeeze this trigger as well.
Now I'm going to fire this up.
It's going to get loud.
Ready?
Wendy: Okay.
Kevin: And that'll start the blade and the vacuum.
So you're going to get your position.
Come up, start it.
And then while you're holding it and the blade is spinning, you're going to come down and cut.
How do you feel?
Wendy: Good.
Kevin: All right.
You got any questions, you ask me.
But I know you can handle it.
So go for it.
You like that position?
Wendy: Yeah.
Kevin: All right.
Nice and tight against the fence.
Start it up.
Lift it up.
What do you think?
Wendy: Pretty good.
Kevin: Kaden, did she nail it?
Kaden: Yeah.
Kevin: Nice job.
Feel good?
Wendy: Yeah.
Kevin: All right.
That's the first apron.
You want to do another one?
Wendy: Yeah.
Kevin: Remember, kids, it's always important that you ask first, and you've got to use the tools with a grown-up.
Perfect.
Well done.
Keep them coming, Kaden.
♪♪ ♪♪ Okay, so this is our last piece.
And you notice that we've got it labeled shelf.
Instead of measuring, we're just going to trace the one that we have here.
Nice and tight against this one and drag it right across.
♪♪ Wendy: Draw here.
Or you can do it that way.
♪♪ Kevin: All right.
With the boards cut, we are going to start bringing them together.
And that's called joinery.
So joinery is when you bring two pieces of wood together and fasten them.
And there's a whole bunch of different ways to do it.
We're going to do it with something called pocket screws.
Okay?
So this is a pocket screw right here.
And you can see that it's got a head, a shank, and some threads right there.
You know why they call them pocket screws?
Kaden: 'Cause they go in your pocket?
Kevin: Only if you're sneaking them out of the shop do they go in your pocket.
No, they call them pocket screws because we're actually going to put them in a pocket that we make in the wood.
Pocket screws always work with a jig to drill the pocket at an angle.
Boom.
Take it out.
Nice.
Look at that.
All right, let's see how we did.
You can see inside the pocket that there's a little hole from the drill bit.
Well, that will help us drive in the screw.
So take this.
Just stick it in.
Good.
Now, before, check your line.
You still where you want to be?
Wendy: Yeah.
Kevin: And you'll feel it sort of bottom out and be done.
So you don't have to kind of crush that trigger.
You just have to get it so it's fastened.
Look at you.
You got it.
There you go.
Perfect.
[ Drill clicks ] Did you hear that?
That little clack-clack.
That means you got it nice and tight.
♪♪ For the top, we're actually going to use a nail gun.
Oh, yeah.
One more.
One right here.
Remember our plywood?
This is our back.
But it's only behind the shelves because the clothes hanging side... What do you think?
Wendy: Wow.
Kaden, we built this.
Kaden: Yeah!
Kevin: Yeah, you did.
You guys are Toys and Colors, so what do you say we get some color on it?
Wendy: Yeah, let's do it.
Kevin: All right.
So I know you guys are all about the colors, but to make sure that the color paint sticks to the wood really well, we always prime first.
This is primer.
Primer is dry, which means we can get the colors on.
♪♪ ♪♪ Okay.
Paint is dry.
We can load it up.
You guys want to hang those on the bar?
Step back.
Take a look at it.
What do you think?
Wendy: Looks great.
Kaden: Yeah.
Kevin: I totally think you guys can build this on your own now.
Share it with your friends, everyone who watches your stuff.
That is terrific.
Wendy: Can we ask you one more question?
Kevin: Yeah, sure.
Kaden: Can you play dress-up with us?
Kevin: Dress-up?
Kaden: Mm-hmm.
Kevin: Me?
Kaden: Yes.
♪♪ ♪♪ Wendy: here you go.
Kaden: Wait, I have one more.
Hey, nice project, sonny boy.
Kevin: Oh, my goodness.
That's my favorite costume of the day.
You look awesome.
Well, this was a ton of fun, guys.
Thank you for coming.
Thank you for letting me join.
Wendy: You're welcome.
Thank you for helping us build a closet for our clothes.
Kaden: Yeah.
Kevin: I knight you Pops.
You look exactly like him.
♪♪ Kevin: Next time on "Ask This Old House," Lee heads to the Pacific Northwest to learn about grass seed manufacturing.
Lee: It's almost like panning for gold back in the day.
Kevin: Then Mark gives a primer on pavers, the various materials available and how to arrange them.
And Nathan gets some help from an apprentice installing a porch swing.
Nathan: Thank you.
[ Cheering ] Kevin: All that on "Ask This Old House."


- Home and How To

Hit the road in a classic car for a tour through Great Britain with two antiques experts.


Support for PBS provided by:
Funding for Ask This Old House is provided by The Home Depot, Renewal By Andersen, and ChipDrop.